
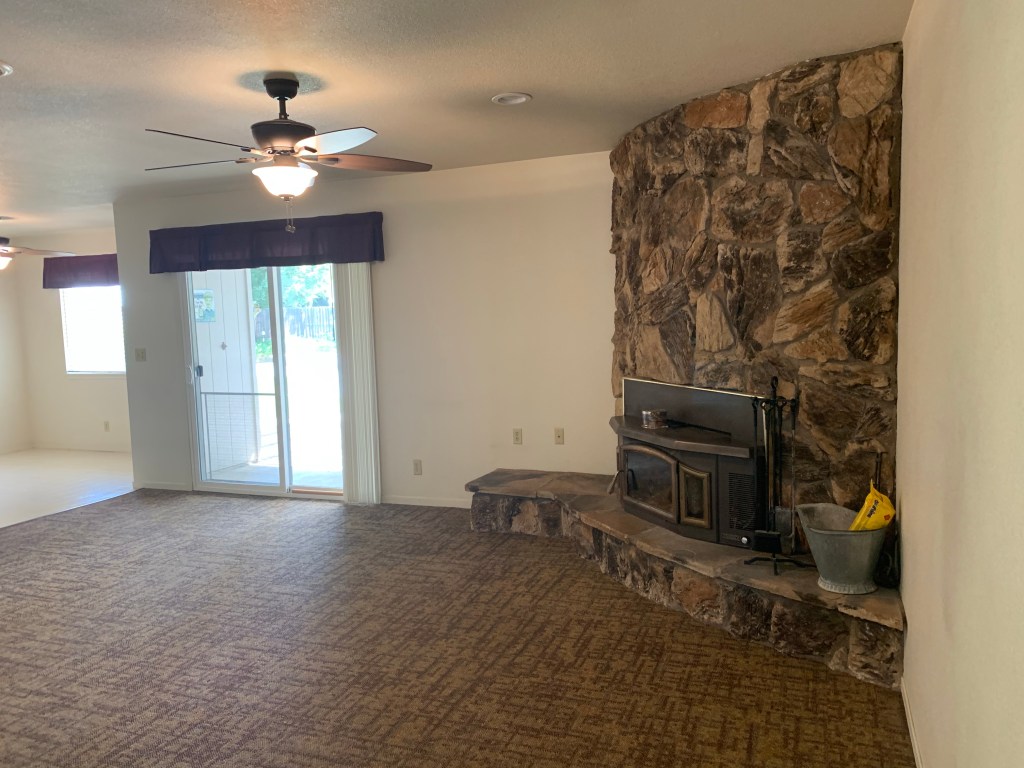
We recently bought a home built in 1978. We are so excited that we were able to do some renovations to our new home before we moved into it. The first room that I’m able to show you is the family room. It is adjacent to the kitchen and dinette with access to the backyard and semi-covered patio. Here’s what we like about the family room:
- Open flow to kitchen, dinette and outdoor patio
- Natural stone fireplace
- Ceiling fan for air circulation
- Sliding glass doors in good working order
- Kitchen counter bar with room for lots of extra seating
The renovation of the family room included:
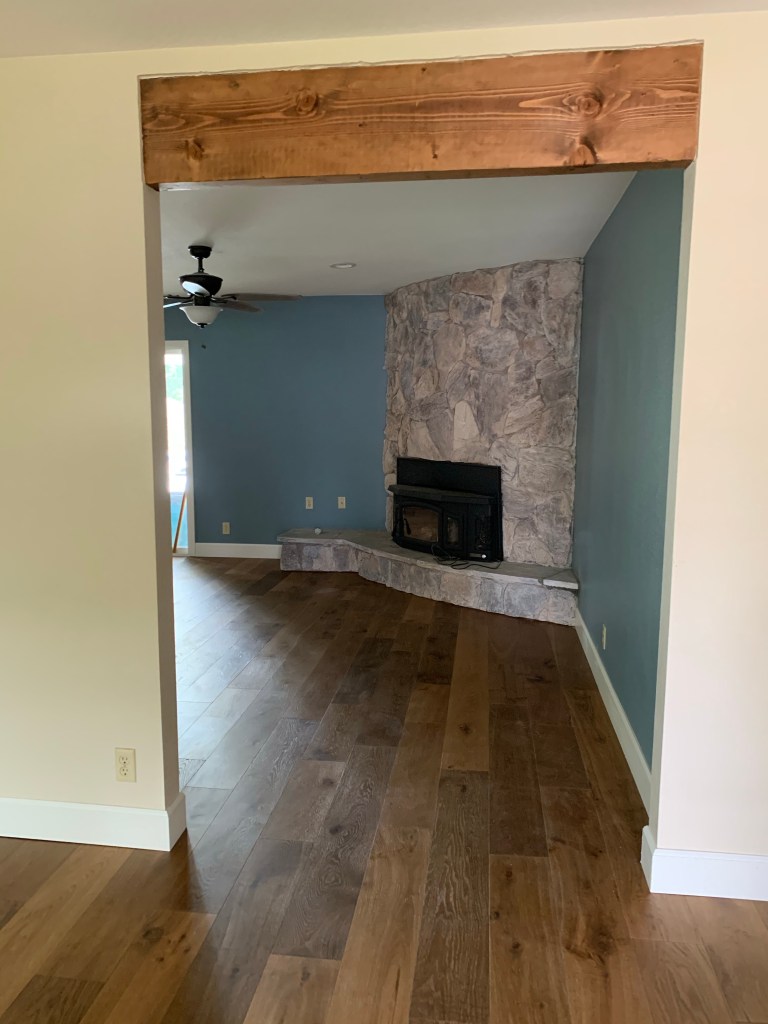
- Widening the doorway into the room from the front entry
- Staining an exposed beam instead of covering it back up with drywall
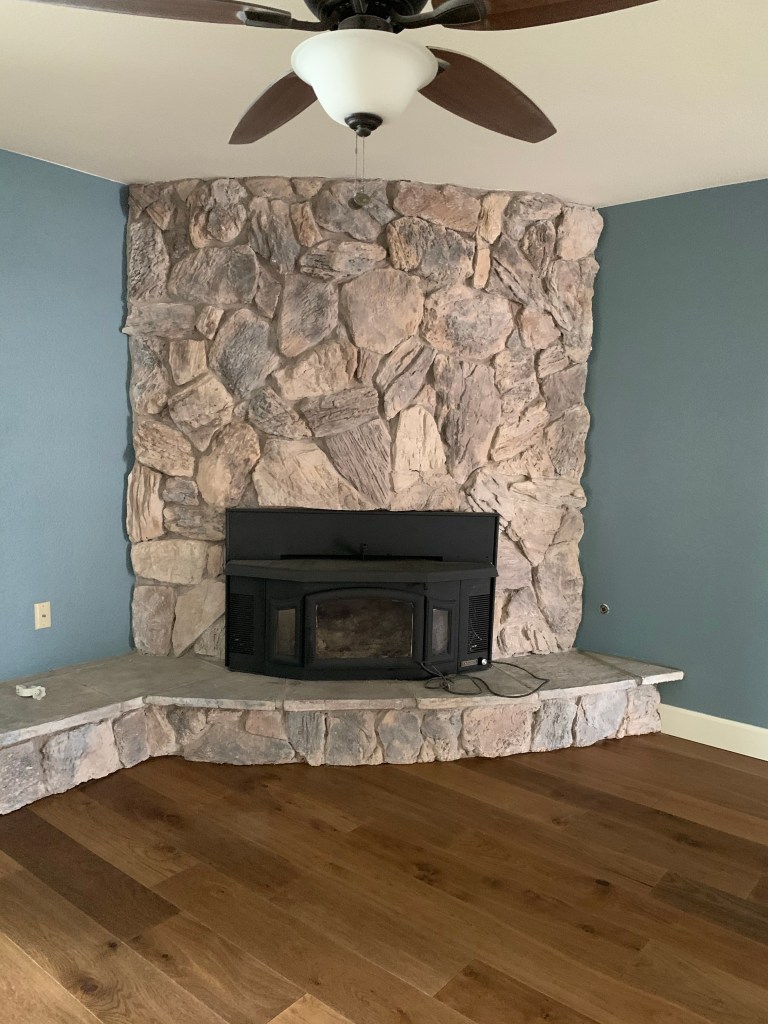
- Whitewashing the volcanic rock fireplace
- Spray painting the wood stove insert
- New paint by Sherwin Williams: Alabaster in semi-gloss for trim, and flat for ceiling, Poolhouse in satin for accent walls, Maison Blanche in satin for other walls
- Replacing the basement carpet squares flooring
- New baseboards (5 & 1/4 inch)
- Removing the purple fabric valence
- Replacing the vertical blinds covering the sliding glass door
The family room has a large floor to ceiling fireplace made of volcanic rock that we’ve seen in other homes built in this time period. One of our first DIY projects was to whitewash the fireplace on Mother’s Day.
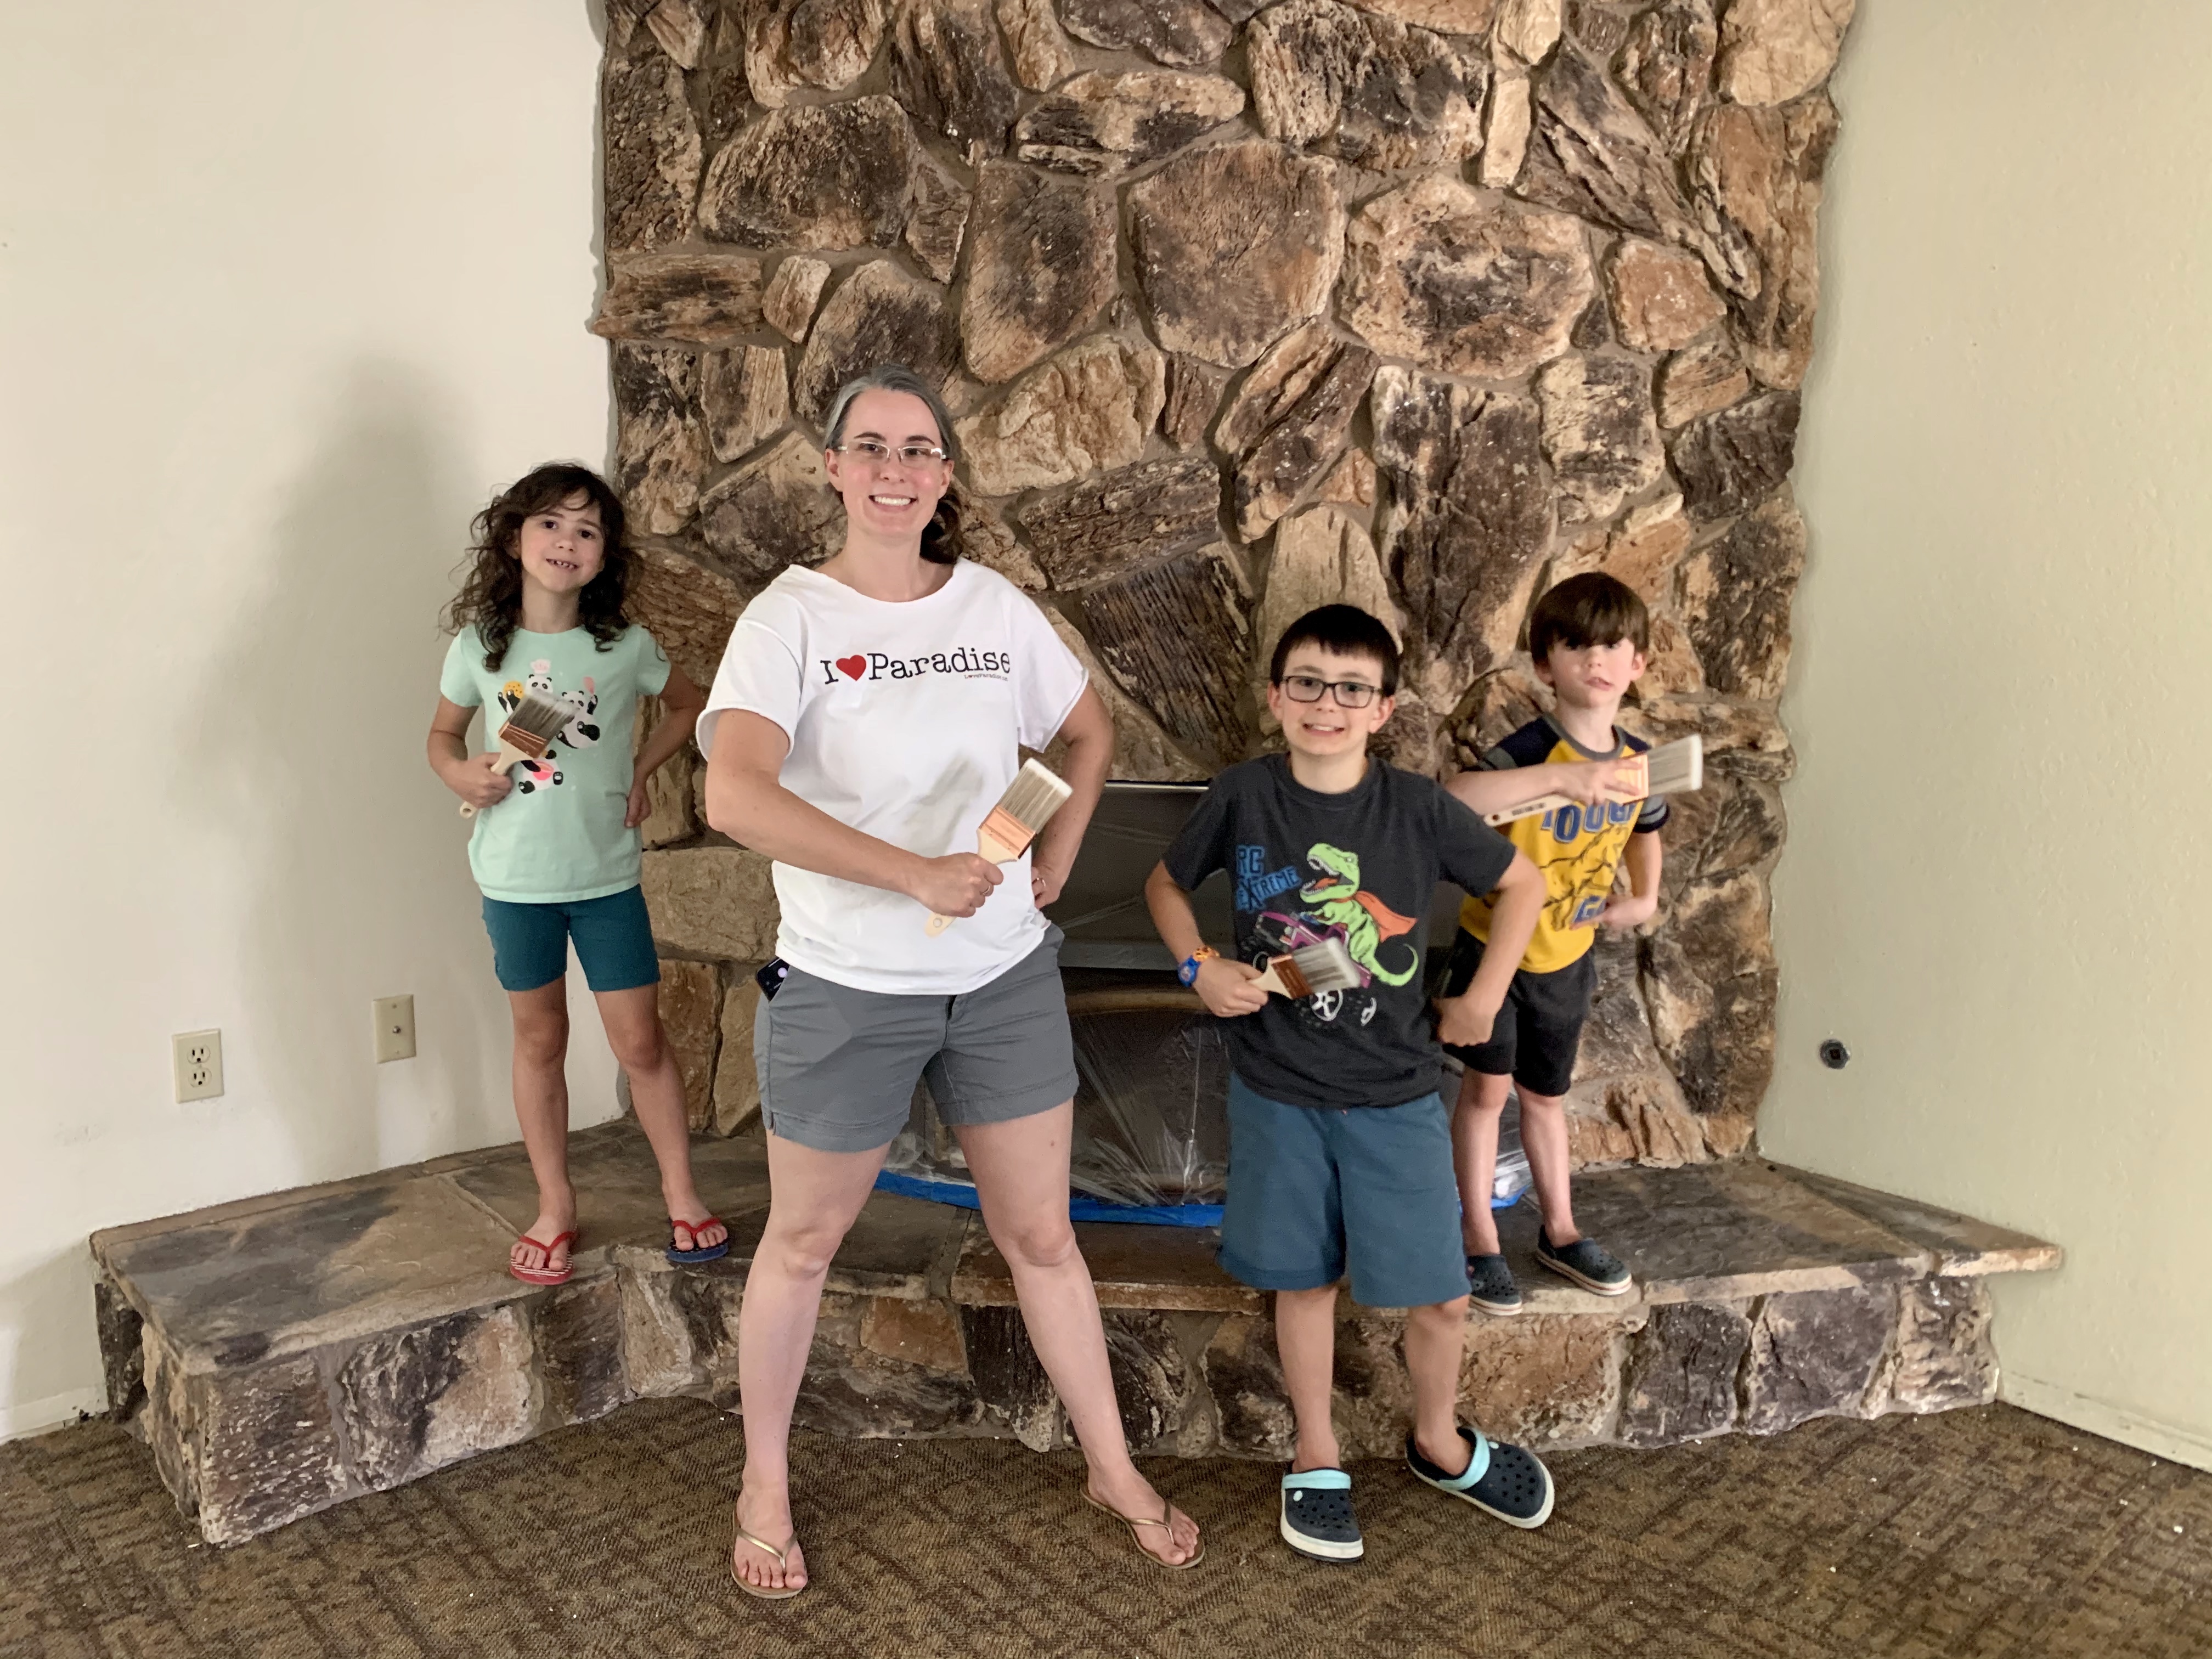

The whitewash project was much more difficult than I had anticipated. Those darn rocks were so hard to whitewash. I’ve done lots of painting before but this was another beast entirely. I’ve never whitewashed anything. The only thing that was the same as painting was that I used a paintbrush!! lol
The mixture of 1 part Kilz primer to 2 parts water was so watery and it was dripping and splashing absolutely everywhere! At the same time, the mixture was too thick and it was making the rocks look like they were painted solid white. My poor husband, E, was not happy with the project about 15 minutes into the application. The first 10 rocks were definitely looking like they were just painted white. E was really really not liking it! His voice said, “we need to reevaluate what we are doing here.” His eyes said, “why are you ruining our house?”. Don’t worry though, he likes it now, after I finally figured out how to do it right, but for a minute there he was very unhappy with my project. Fortunately, it was Mother’s Day so he couldn’t very well end the project and so the poor, dear, sweet man smiled and trudged along with me to the completion of the project.
I ended up taking a spray bottle and getting each rock really wet with water one rock at a time. Then after I scrubbed the whitewash mixture into all the cracks of the rock I sprayed it with water again. Then more dripping and splashing while I scrubbed with the paintbrush again, as fast as I could to catch all the drips so it didn’t have drips and streaks running down it. It took way more finesse than I had hoped for.
Of course, by the time I figured out the right way to do it, the paint had dried on those first 10 rocks that were just solid white. E had to make another run to Home Depot to get a wire brush attachment for his drill and use that to scrub all of those rocks off so we could redo them. In the midst of that, he stepped on the hearth and broke a huge section of it off. So then we had to figure out how to reinstall that piece of broken hearth with mortar! Such an adventure! 😂
My youngest son (age 5) was reading my mind that day and said, “Mommy this will be so nice when we move in and we can see this and remember how we all painted it together.” Awe! That is, in fact, exactly what my mama heart was hoping for! We ended up sending the kids outside with my parents after those first 10 rocks were just not turning out the way that we wanted them to, and I realized that the project was going to be much more difficult than I had originally thought. Luckily, the kids still feel like they helped with the project. Each of them can tell you the rocks that they painted. Nevermind that we scrubbed them off and redid them!
I am really happy with the way it turned out. Though it is still is reminiscent of 1970-something, it’s a little more toned down. When the professional painters came the next day to start painting they didn’t notice that anything had been done to it, and that’s a huge compliment in my book! E showed them the before and after pictures and they said “so that is that super old 70’s rock”. So in the end, it was totally worth it and I would definitely do it again, especially now that I know the white wash mixture needs to be watered down more than I thought.

Before 
After
Here are the “after” pictures with the new flooring and paint.


🚧 Are you working on any projects this summer?
🚧 What’s on your wish list of projects to get done?

That family room looks good. I like the rock on the fireplace with the lighter color. You did a wonderful job.
LikeLiked by 1 person
Thank you Peggy!
LikeLiked by 1 person
What a fabulous renovation! I don’t have any projects in the pipeline.
LikeLiked by 1 person
Thank you Sheree!
LikeLiked by 1 person
Great job!
LikeLiked by 1 person
Thank you T!
LikeLiked by 1 person
This looks absolutely gorgeous! It all came together beautifully. I am sure you will enjoy it for many years. Have a good day!
LikeLiked by 1 person
Thank you Betty!
LikeLike
Looks very nice! We are planning on replacing all our flooring throughout our house!
LikeLiked by 1 person
Thank you R!
New floors are fantastic & a huge project. Praying it goes smoothly for you!
LikeLike
The spray painted insert, too! Already making memories in your new home 😘 looks great!!
LikeLiked by 1 person
Thank you LT!
The black spray painted fireplace insert was an idea from Kris, our friend/general contractor. He was right! It really makes it look a lot newer. E got high heat spray paint at Lowe’s.
LikeLike
Looks very nice! Our main projects are organizing all the closets again before the new school year and hopefully breaking ground in Paradise.
LikeLiked by 1 person
Praying that all your projects go smoothly for you!
LikeLike
Wow! Amazing transformation. I really like it.
LikeLiked by 1 person
Thank you 😊
LikeLike
E did a great job spray painting the fireplace insert.
LikeLike
Looks so great!!!
LikeLiked by 1 person
The fireplace whitewash is wonderful. Great work!
LikeLiked by 1 person
Thank you Lillie 😊
It turned out better than I expected!
LikeLike